To take action on your behalf on a social network, Salesloop needs to connect as you. To do this, it needs your session cookies. This will give the Salesloop access to your account and allow us to take actions on your behalf, either automating or improving the functionality available to you.
So why session cookies? And what the hell are they even? Session cookies are explained in more detail below, the quick summary is: it makes it easier, more reliable and more secure when connecting your account with a third party software tool (i.e us at Salesloop!).
For example, using a session cookie mean you don’t have to share passwords with us and worry about where they are going, who is seeing them. It also means when you connect your social network account, its a more reliable connection – when you’re using passwords, you have to worry about recaptcha and other obstacles that social media accounts implement to stop you sharing your account with others.
For the full tutorial about how to get your session cookies, watch the video below:
INSERT VIDEO
More details on session cookies?
Every time you log into your social network account, a new cookie is created for that “session” of time that you remain logged into the account. If you log out or are disconnected, the cookie expires. A new cookie is automatically generated once you log in again.
Salesloop is able to connect and automate on your behalf with these cookies.
As mentioned above, Salesloop doesn’t have to know your password or email and you can easily reset cookies when you manually log out of a websites!
Get your cookies using Salesloop’s browser extension
To make your life a little bit easier, we’ve got a browser extension which will automatically retrieve your cookies for you. You can install this directly from your Chrome web store account by clicking the “Add to Chrome” button at the top right:
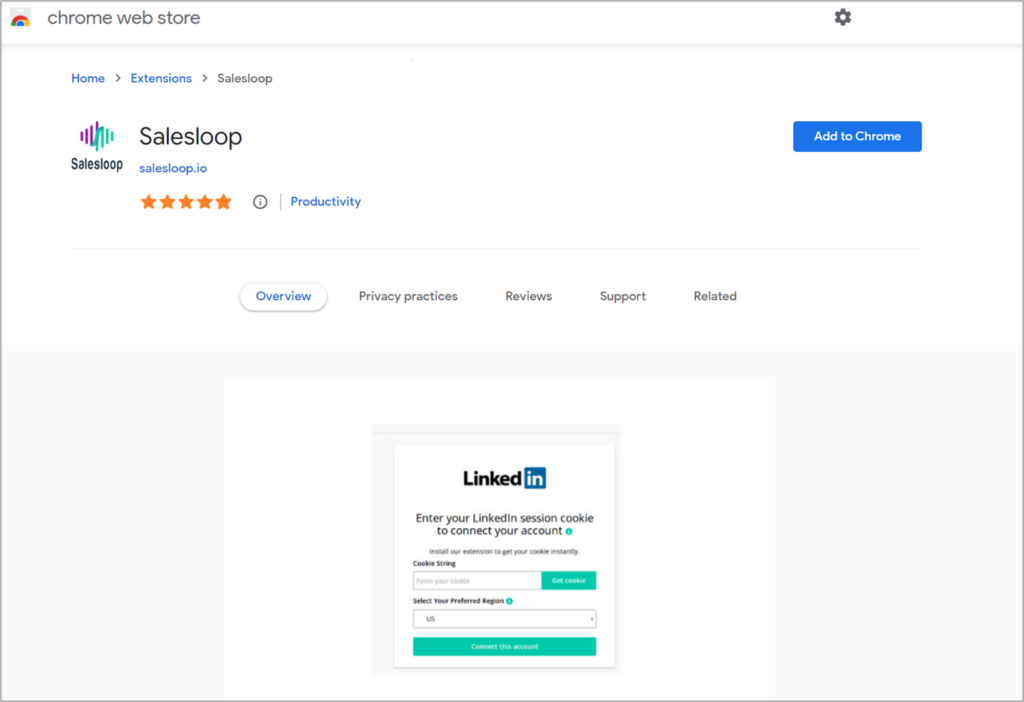
Alternatively, you can get there directly from within Salesloop:
Once you log into Salesloop, you’ll find the “Connect a Linkedin Account” option at the top right.

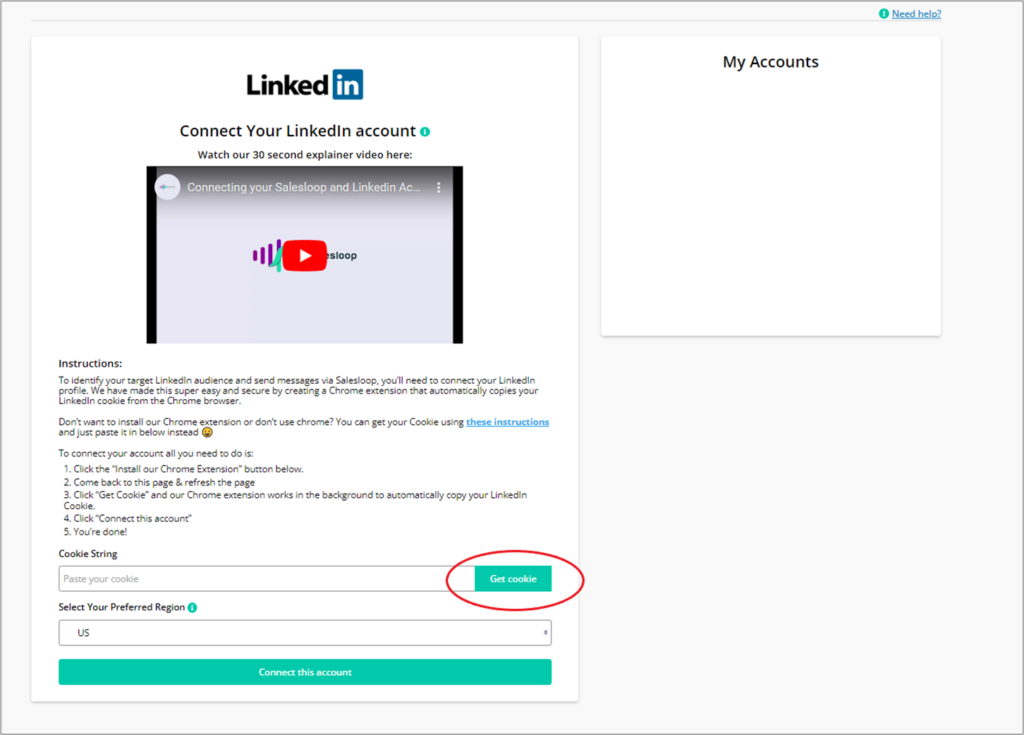
Clicking on that, will bring you to our Accounts page, showing which accounts are connected. Below you can see none are connected yet – and to the right of the page, you have all the instructions to connect.
The green button circled in red below shows where you can click to open a new tab and install the chrome extension.
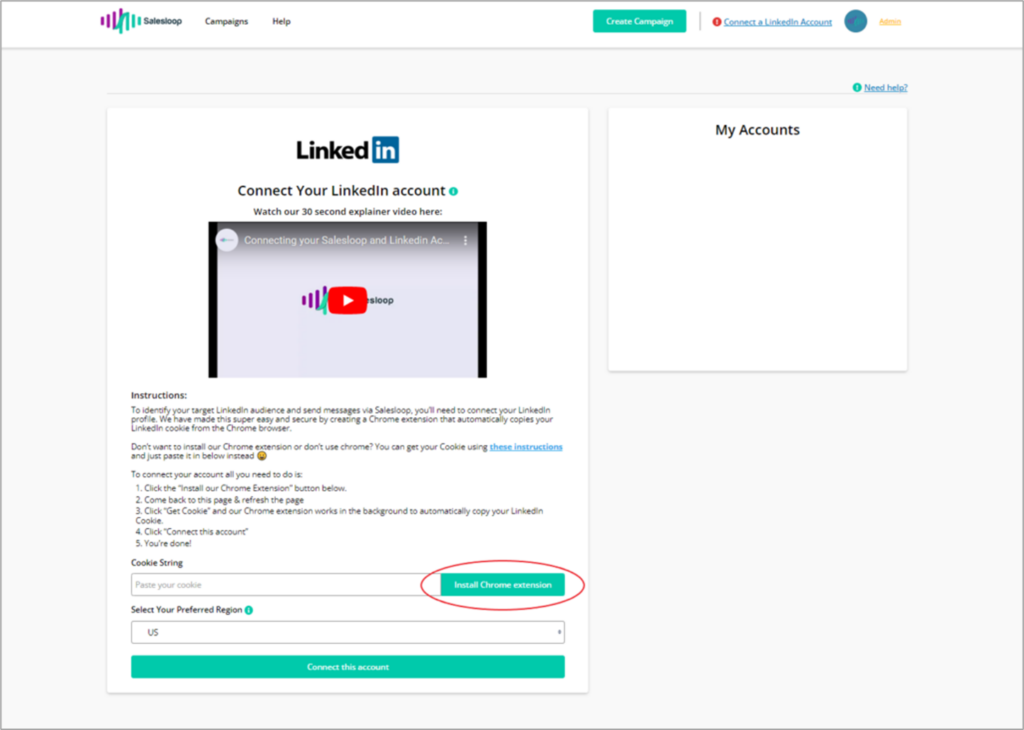
Once installed, you’ll need to return to this page and you’ll have to refresh the page – once refreshed, you’ll see the green button text has changed and allows you to “Get Cookie”. Once clicked, our chrome extension acts in the background and pulls in your Linkedin Cookie.
IMPORTANT: You need to be logged into Linkedin to capture your Linkedin cookie, if you are not logged in, when you click the button, a new tab will open and you will have to log into Linkedin. You can then come back to this page and click “Get Cookie” 😉
Don’t want to use our Chrome extension? You can always get your cookies manually!
We wrote this tutorial with Chrome users in mind. Here’s how to access your cookies with Firefox or Safari.
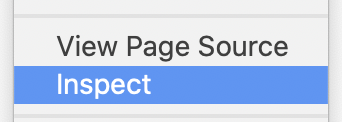
If you aren’t using Chrome or Firefox, don’t worry. You can still find your session cookies for any site manually. Open a new tab and go to the website which you want your cookies for. Right-click anywhere on the page and open “Inspect”:
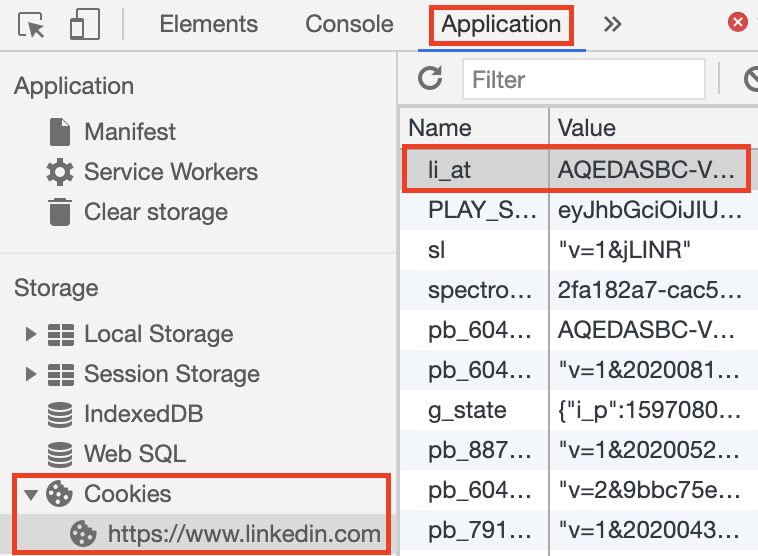
Locate the “Application” tab. Then select “Cookies” > “http://www.websiteyoureafter.com”. Locate the cookie you’re looking for (so, for example, for LinkedIn you’ll be looking for the “li_at” value):
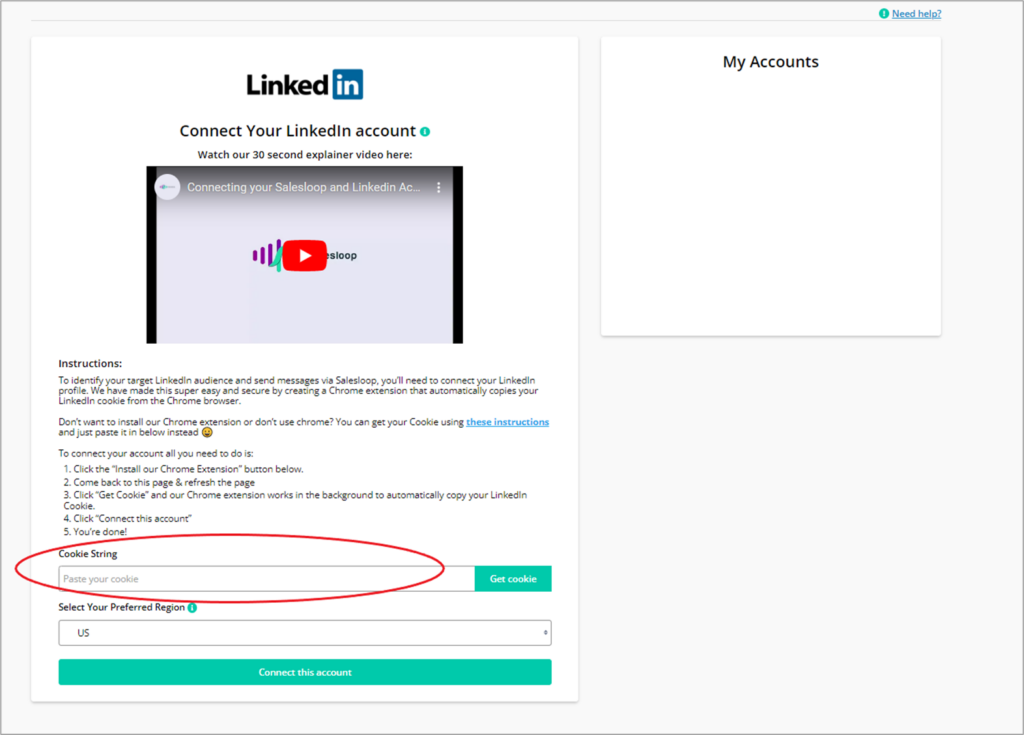
Copy this and paste it into the “Cookie String” field below:
You’re all set!
Take note: make sure not to manually log out of the site you’ve retrieved your cookie for, as this will cause it to expire and you’ll have to reconnect. When we make it that easy though, its no biggie 😉

