Drawing in applicants to your job vacancy can often result in a low-yield, high-cost outcome. It’s staggering that all too often the cost required for a low number of average applicants to a job position is stiflingly high. The problem is particularly acute on Linkedin job postings – where you seem to get minimal applicants until you spend to promote the job post.
So here at Salesloop, we decided to tackle this problem.
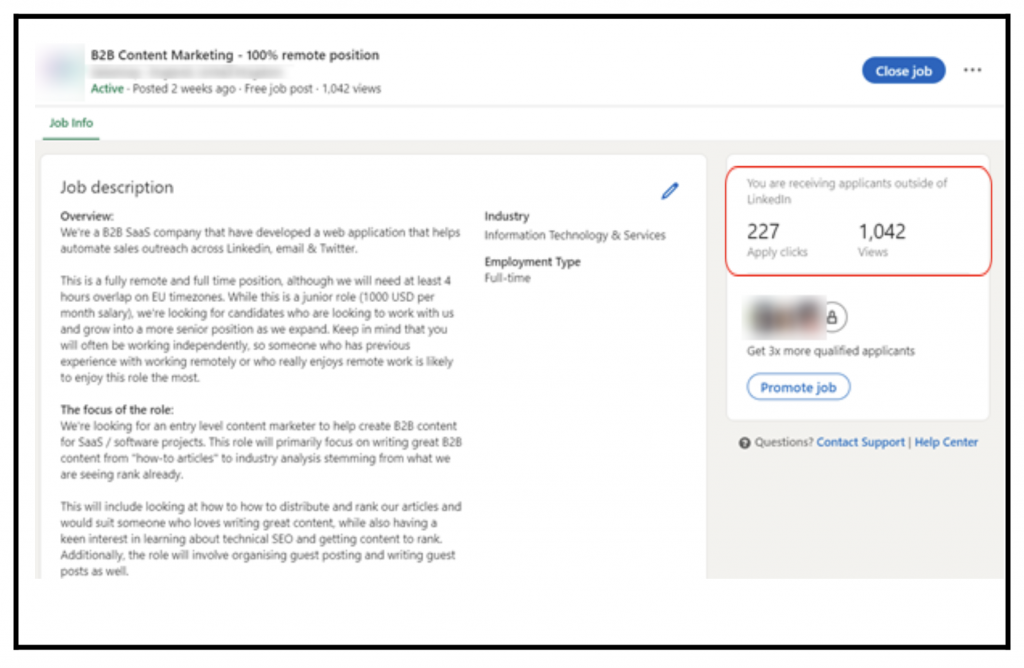
In this post, we’re going to show you how we hacked the Linkedin job posting process using Salesloop, to get our B2B Content Marketing job post a whopping 227 apply clicks and over 1,000 views in less than three weeks, at 10% of the price of a promoted Linkedin job post over the same time period.
So let’s compare the costs:
Purchasing our cheapest Salesloop package at just $49/month is a snippet of the charges you could ring up when trying to promote your job post.
Particularly when you compare this to Linkedin’s pricing – with their minimum package of £14 / $19 daily for 30 days, the total cost would be £420 / $580 ???? for a month, which is over 10x the price of Salesloop.

And to recap these were the results:
Our job post using Salesloop automation received a whopping 227 apply click and over 1,000 views in less than three weeks.
Using Salesloop is easy and effective – we’ve got videos, and tutorials and even better we break down our tactics in blog posts like this.
With that said, lets get stuck in – here’s how we did it:
The 7 steps to boosting job post applications
To get the same results, we’ve broken down the process into 8 steps for you to replicate:
Step 1 – Create the job post
Step one focuses on the primary description of the job role, so ensure the content is written concisely, well-structured with headers and specific on what skills you’re looking for.
Ensuring your job description is well-organised will immediately make the job post look visually more professional and appealing to applicants.
Make sure to use headers and paragraphs because a lack of structure can put off applicants. For example, here’s what to avoid:

Step 2 – Set as a free job
Using the Linkedin job posting tool, make sure you choose to advertise the position as a ‘Free’ job. This ensures you avoid the £14 / $19 daily Linkedin charge for minimal results.

Step 3 – Create a Salesloop automation campaign targeting your ideal candidates
Create a Linkedin or Sales Navigator search that captures your ideal applicants. Sales Nav is great for this as you can target by years of experience, job title, expertise etc and get really specific on the profile of your future employee.
For example, we targeted content marketers in the US, with “B2B SaaS” in their profile who had at least 2 years experience:
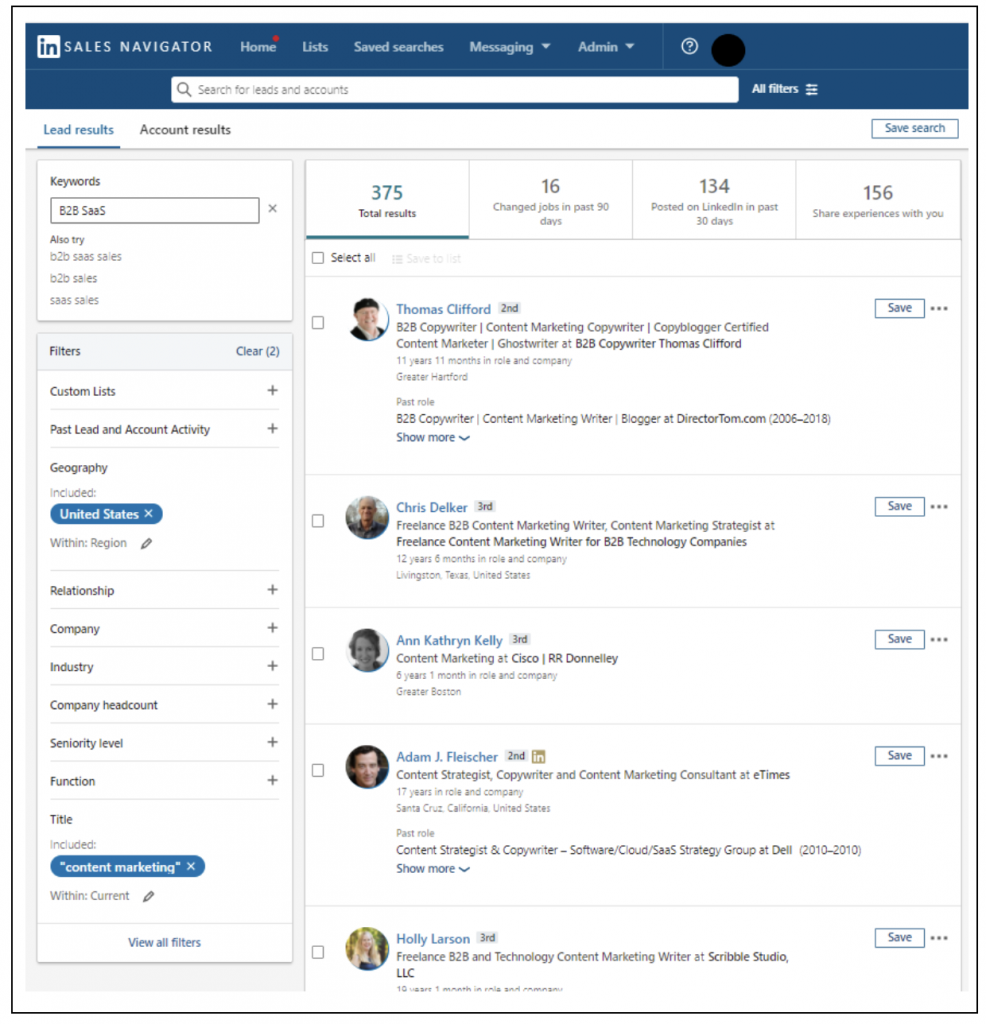
Once you’ve got the ideal candidates showing up in your search results, you’re ready to set up a Salesloop automation campaign targeting those individuals.
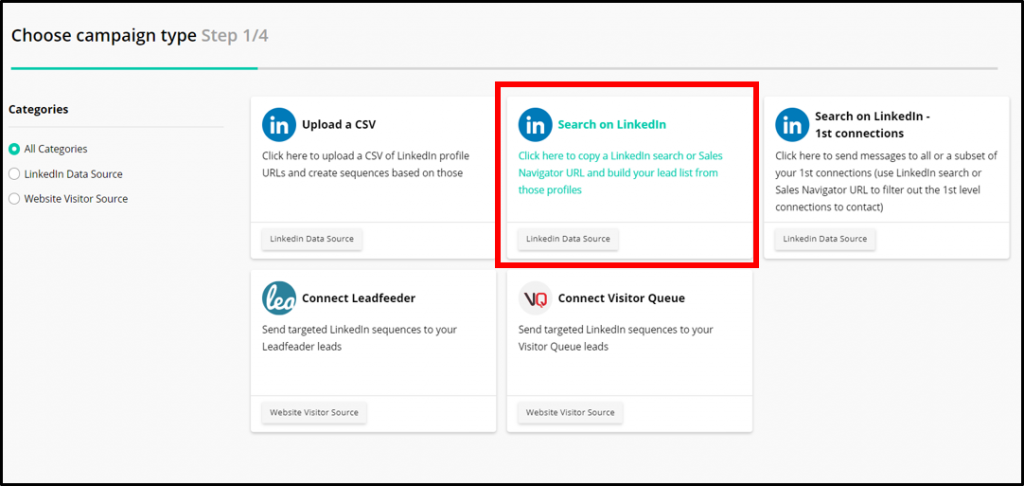
It’s as easy as copying the URL in your Linkedin Sales Navigator search and then creating a new Salesloop “Search on Linkedin” campaign. You’ll copy in that Sales Navigator URL and you’ll then be able to create a Connection Request and Follow Up message that will be automated to your candidates, linking back & driving traffic to your Linkedin job posting.
Step 4 – Craft your Connection message
Structure your message using a simple introduction such as the example shown above. Featuring the link to the job application is vital to ensure ideal targets find their way to the job application page on Linkedin.
Use a friendly sign-off and voila! The message format is created and ready for sending to your ideal job vacancy targets.
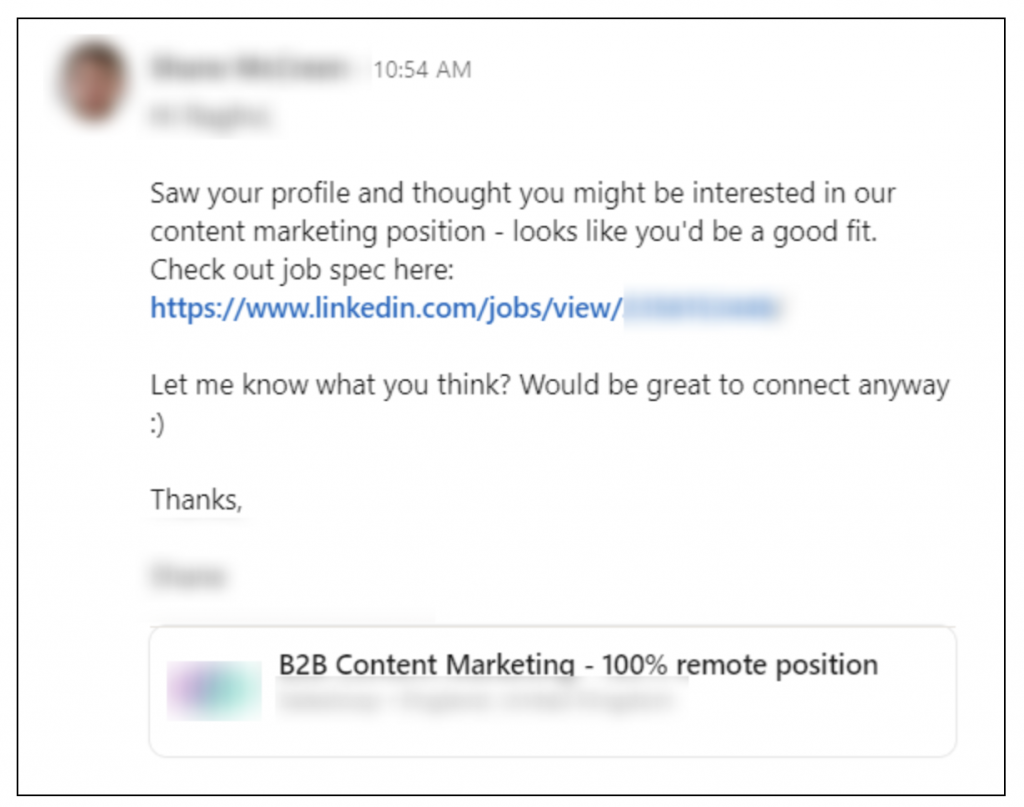
Use a friendly sign-off and voila! The message format is created and ready for sending to your ideal job vacancy targets – this example above keeps within the 300 character limit as well ????
Step 5 – The Follow-Up
The art of the follow up is absolutely vital in sales & recruitment, as often your customer or candidate targets will connect and then get distracted or overlook the initial message. To overcome this obstacle, utilise the follow-up message in Salesloop to remind the connection of the job post.

This example above is effective, as it simply engages the candidate and calls attention to the job post with one question – what did you think of the role? The beauty of it is it ensures the message has been received, noticed and further increases the likelihood of maximizing job post traffic.
Step 6 – Monitor campaign and review replies directly via Salesloop
Using the campaign overview, you can directly monitor your job vacancy promotion campaign and review all responses directly through Salesloop.

The utility and layout of Salesloop develops a one-stop-shop for all campaign engagements and communication activities. This saves you time hopping from one webpage to another while showing you only the vital information you need / want to see.
Step 7 – Track how many views it gets from your ideal target audience
While you’ll be able to see how many Connections Sent have been sent in your campaign, you’ll also get insights into how many Connections Accepted and Replies you receive as well.
And make sure to engage with those candidates as much as possible – and if you have an attractive position and salary, you may get a bucket load of attention and messages coming your way, like we did:

All in all this really proved to us the potential of using Salesloop automation to drive results at a fraction of the price.
Below is the hard evidence as well. 227 apply clicks.
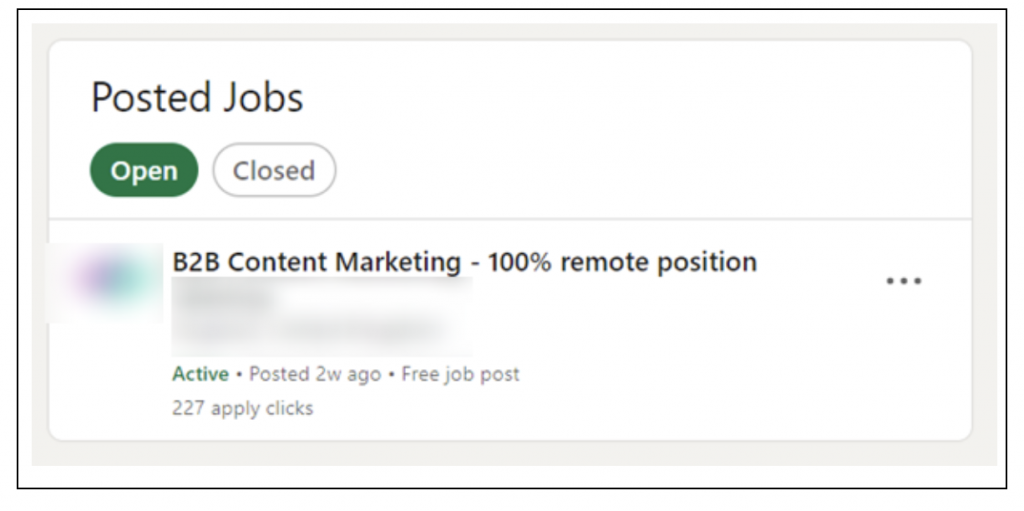
With Salesloop, there are no excessive expenses involved when utilising all the features mentioned – as we cost nowhere near the £420 / $580 (equal to £14 / $19 x 30 days per month) that Linkedin would charge you.
Compare that to the monthly fee of $49, the utilities of Salesloop and ability to supercharge your job post to your ideal candidates and you’ll see you’ve got a bargain! A total saving of $531 on each job post.
Get started today and promote your job vacancy for maximum effect at minimum cost. Who knows you might hire a kick ass writer who’ll write a kick ass blog post like this ????


