Welcome to the world of targeted Sales Automation as Leadfeeder & Salesloop join forces to create intent data driven sales outreach. On auto-pilot.
What does that even mean? Well for the first time, Leadfeeder customers are now able to effortlessly automate outbound messages to companies visiting their website & more specifically, target the exact job titles of the customers that they usually sell to.
So what exactly does that allow me to do?
Well, Leadfeeder has teamed up with Salesloop, a “best-in-class” Linkedin automation tool that allows users to create cloud-based automation sequences across Linkedin. With this brand new integration, Leadfeeder customers can effortlessly automate a Linkedin Connection Request to the ideal Linkedin profiles of buyers at the companies that are visiting their website.
All you need to do to get setup:
- Connect your Leadfeeder account with Salesloop to share data such as company name & location details of your targets
- Add the job title of your ideal customer
- Salesloop then combines all three data points (company name, location and job title) to identify the individuals on Linkedin that you would usually reach out to
- And then allows you to automate a Connection Request and Follow up message, to identify interested, sales-ready targets on auto-pilot
The result: You’re automating your outreach effortlessly on Linkedin to the ideal target that you want to start a conversation with.
No more manual research on Leadfeeder leads or worse, leads slipping through the cracks because you’ve got too much on your plate to review, research and connect – Salesloop is doing that on auto-pilot for you.
Check out our explainer video or detailed instructions below:
Step by Step detailed instructions:
Step 1:
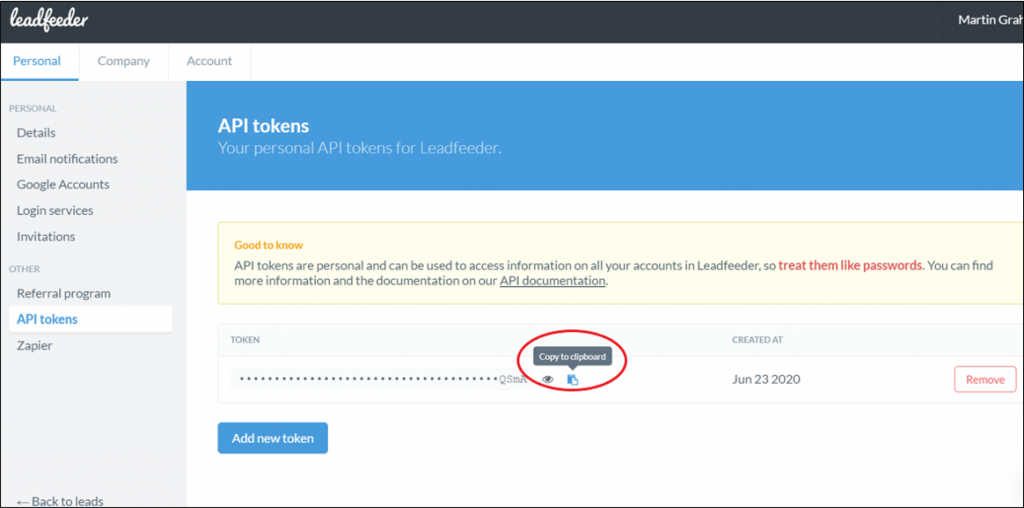
Head on into your Leadfeeder dashboard and under your name at the top right hand corner, you’ll see a drop-down menu. Select “Your settings” and you’ll see “API tokens” listed in the left hand men. Click on it and navigate to your integrations panel. Navigate to the second row and Copy the Leadfeeder API key.
Step 2:
Log in to Salesloop (remember, if you don’t yet have an account use code LF2021 at checkout for an extra 25% off!). If you’re looking for instructions on how to set up your Salesloop account and connect your Linkedin account, check out our Knowledge Base video here.
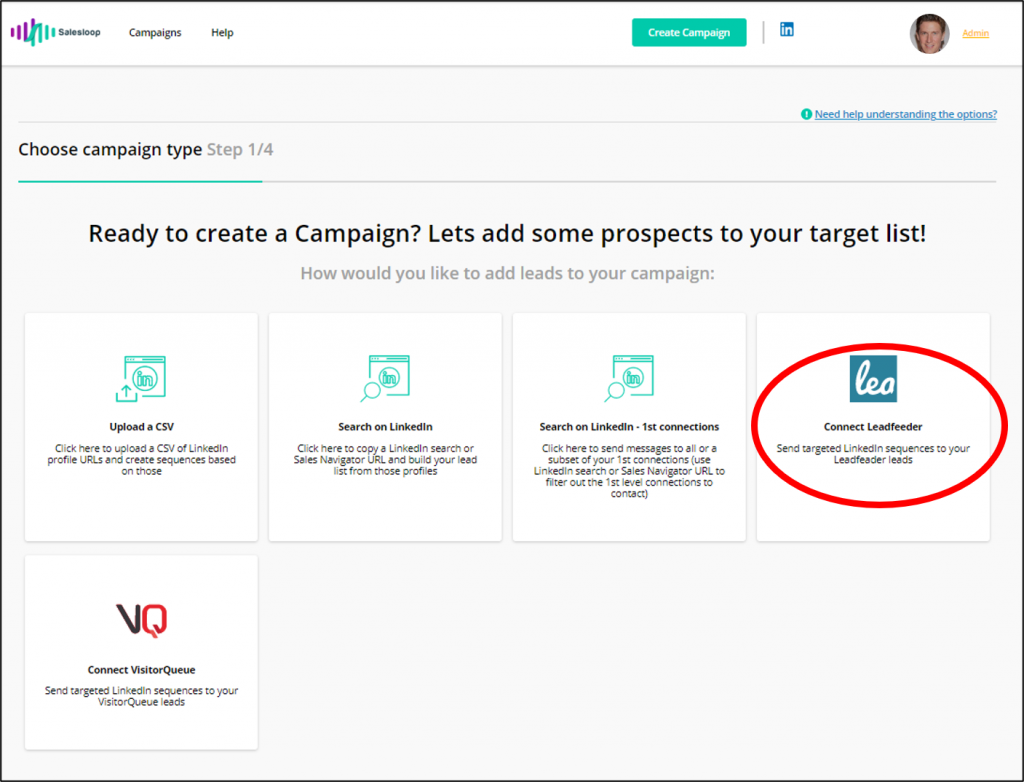
Select Leadfeeder as your campaign type.
Step 3:
Populate the required search criteria – starting with that Leadfeeder API you copied earlier!
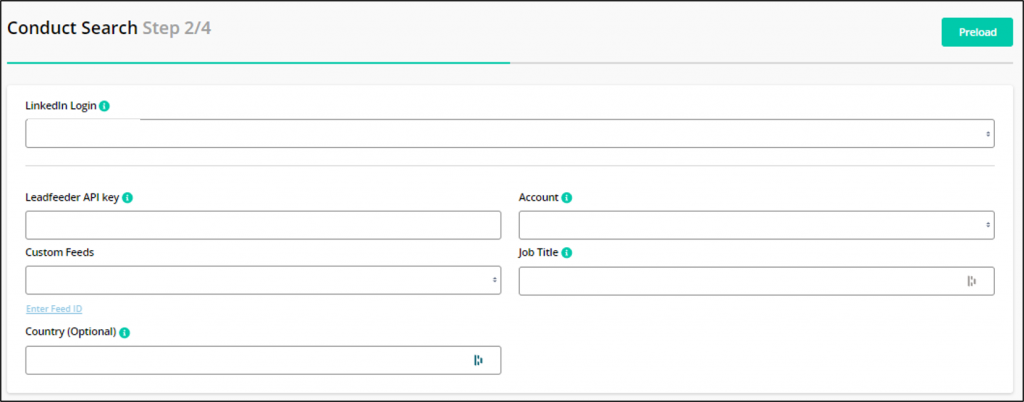
Your Linkedin profile should show under the Linkedin login option at the top – and this is the account under which the search will run.
Remember, when you add the Leadfeeder API you should see confirmation of your site name pop-up under the Site drop-down (this populates automatically).
This now means that Leadfeeder will be sending Company Name & Visitor Location data to Salesloop.
Step 4:
Add in all remaining search criteria, most importantly add in the Job Title you want to target (this section also supports Boolean) and optionally you can also specify / select a Custom Feed (that’s already been set up in Leadfeeder) and optionally include Country filter as well
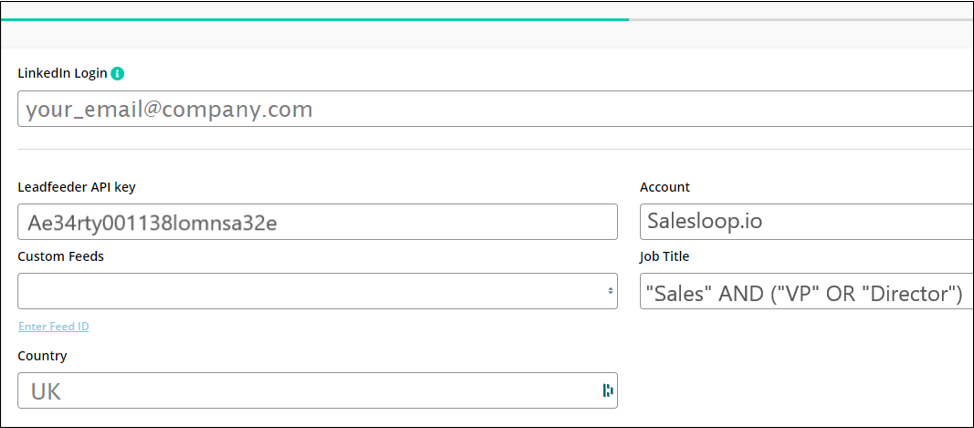
These additional search criteria will be used to help identify the ideal customers profiles that you will reach out to on Linkedin.
For Job Title: This field supports Boolean so don’t be afraid to get really specific here if you want to. Particularly, if you’re receiving a high volume of website visitors, getting very specific on your ideal customer profile is valuable so you’re really targeted in your messages. If you aren’t getting a huge amount of website visitors, feel free to keep this very broad – ie. instead of Boolean, you can use “sales” to identify anyone in the sales function that would be useful to connect to.
For Country: If you’re responsible for only targeting leads in a specific country or countries, you can specify that here as well. For multiple counties, simply separate with a comma. If you want to identify targets in any country, leave this blank.
Once you have your search criteria populated, click on Pre-Load
Step 5:
Pre-Load will create a preview of your search results and show a small subset of profiles. This is really just a sanity check to make sure these are the type of profiles you’d like to contact:
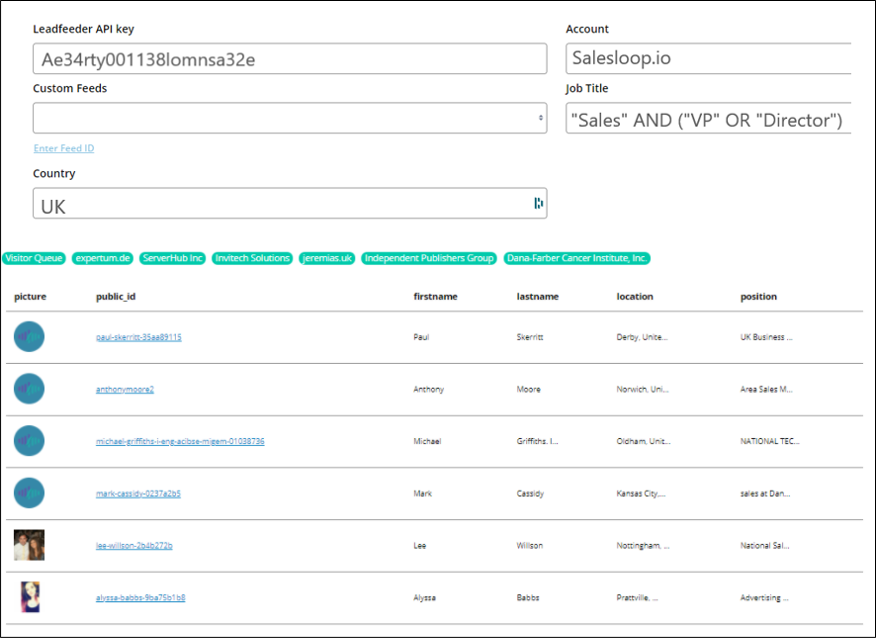
Keep in mind, this is only a preview. Salesloop will take your search criteria and execute a Linkedin search in the background to surface all available results. The first search is done by using all the company results of the last 30 days, following which each day a new search is executed with the same search criteria that you have added.
Once you’ve confirmed that, Click Next.
Step 6:
Create the Messages!
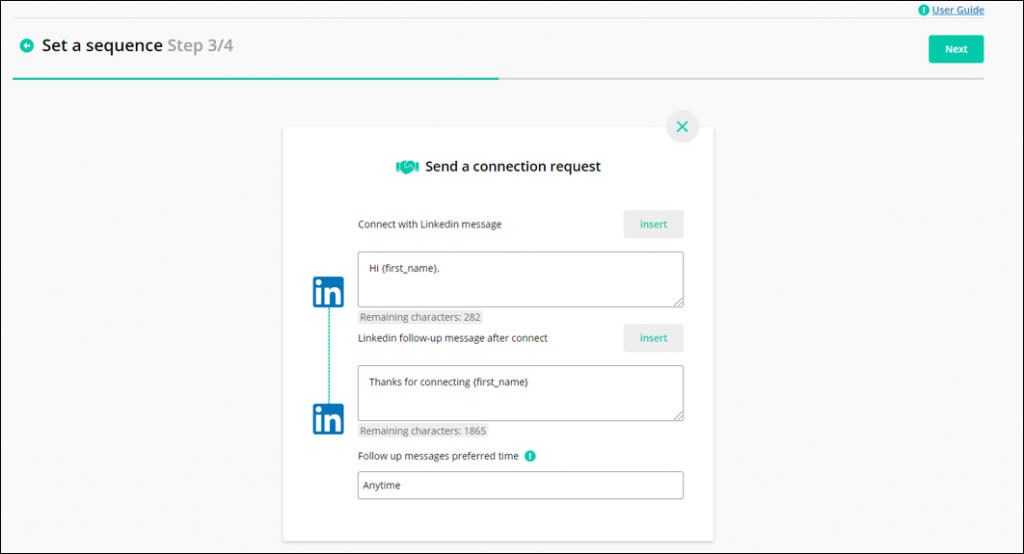
Almost there, while your search is executing in the background, you can finish off the campaign by adding in the messages that you want to send to your ideal customer profiles.
The first message is a Connection Request – so limited by 300 characters.
While the second message is a Follow Up message which does not have that limit, so you can add more detail.
Step 7:
And we’re there. When you click Publish, the campaign will launch – but first, you’ll have to give your campaign a name.
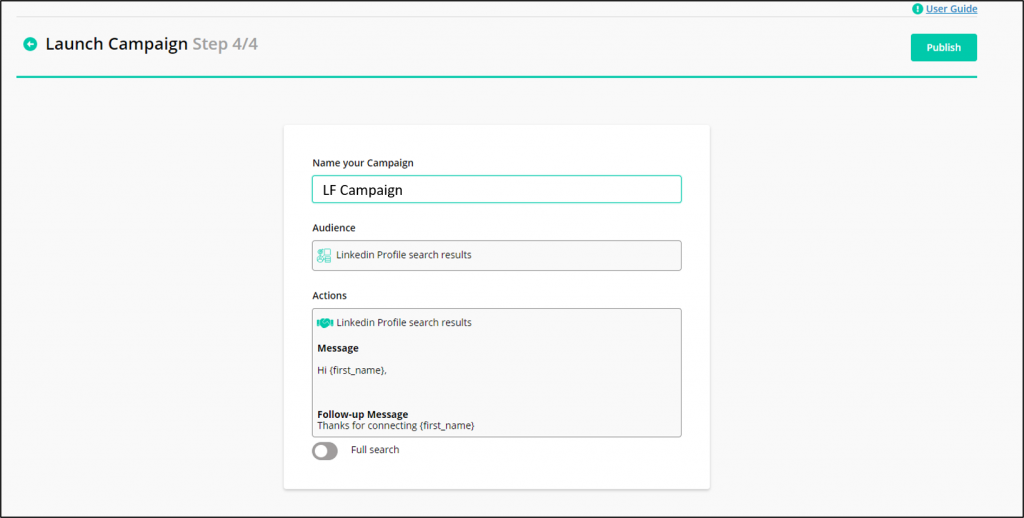
And that’s it – your campaign is now running. It will usually take 15-20 mins to execute the initial search and load up the campaign, primarily as Salesloop uses all the websites it can find via your Leadfeeder integration for the last 30 days.
Every day from here on, it will search the Leadfeeder results for new companies from that day, then execute the Linkedin search using the same parameters (job title, location) and send the Connection Request and Follow up messages you’ve specified.

Once the campaign is live, you can access it via the Campaigns button in the top left & get all the stats updating in (almost) real-time (shown above).
Keep in mind, you can also view Replies by clicking for “More Details” and also link to the Linkedin profiles in your Linkedin account.
Happy prospecting and for any questions drop us an email to hi@salesloop.io

